 By Marcus Linderoth, Thingsquare VP of Engineering
Today we are setting up a wireless network with off-the-shelf hardware: one Raspberry Pi and two Launchpads. This is the first step to setting up larger systems.
Hardware
- One Raspberry Pi 3
- Two or more CC2650 Launchpads
- One USB cable per Launchpad
- USB power supplies
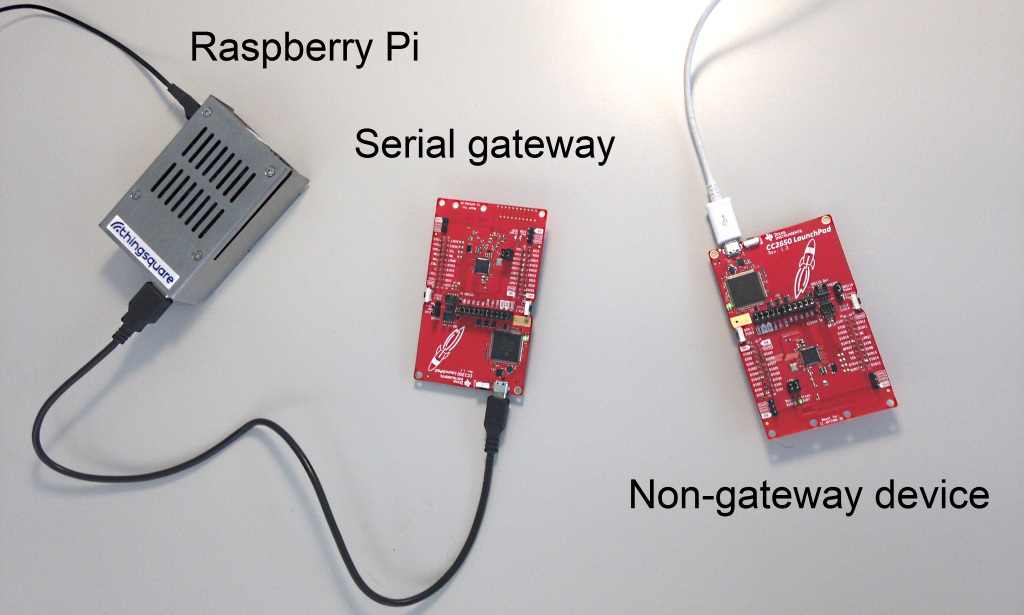
The hardware.
Step 1: Set up the Launchpad hardware
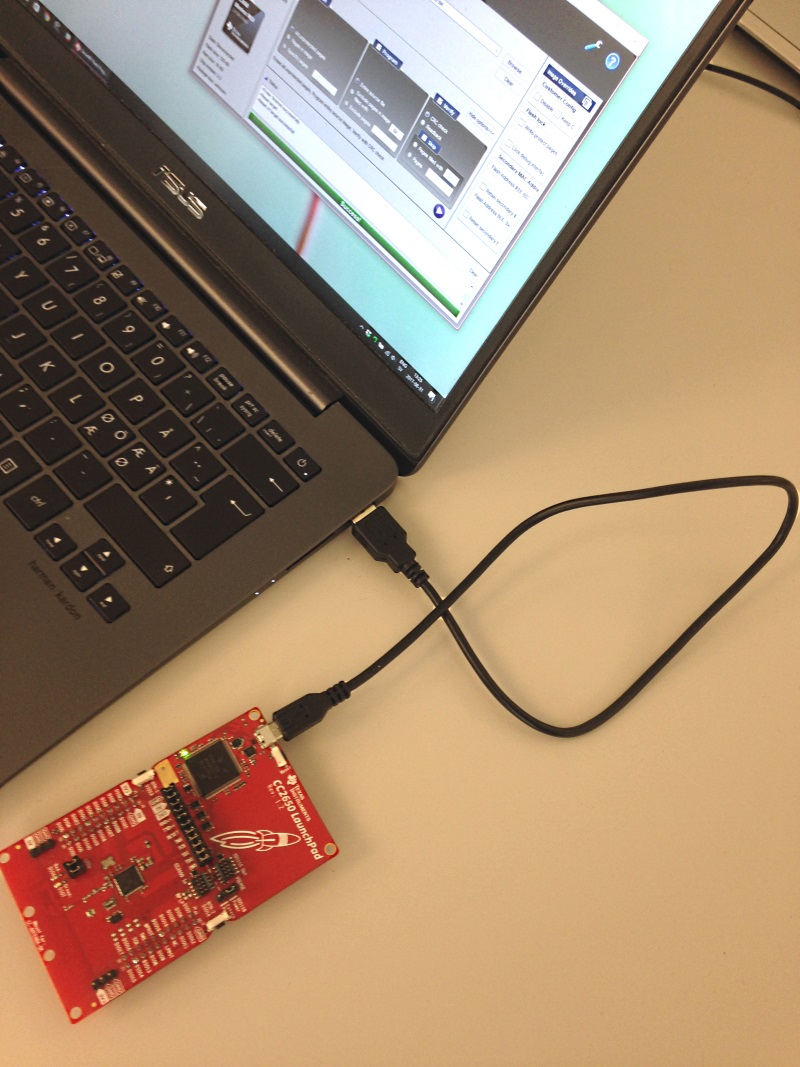
To set up the Launchpad hardware, we need to upload the right firmware to their built-in SoCs. For this we need FlashProgrammer 2 and a laptop computer running Windows.
Install FlashProgrammer 2 from here.
We use separate firmware images for the serial gateway and the non-gateway device.
Flash the serial gateway
Download the firmware image for the serial gateway:
Use FlashProgrammer 2 to flash the firmware to the Launchpad: plug in the Launchpad in the laptop and flash the firmware file to the Launchpad. (Detailed instructions on how to use FlashProgrammer 2 here.)
Flash the non-gateway device
Download the firmware image for the non-gateway device:
Use FlashProgrammer 2 to flash the firmware to the Launchpad: plug in the Launchpad in the laptop and flash the firmware file to the Launchpad. (Detailed instructions on how to use FlashProgrammer 2 here.)
Step 2: Connect the Launchpad to the Raspberry Pi
Plug the USB cable from the Launchpad that was flashed as the serial gateway to one of the USB ports on the Raspberry Pi.
The Launchpad should start blinking red.
Plug in the non-gateway Launchpad into USB power. It should also start blinking red.
Step 3: Configure the Raspberry Pi
The Raspberry Pi will act as a gateway, with one Launchpad connected to its USB port. The Raspberry Pi bridges the low-power wireless mesh and the Internet and must be connected to a WiFi network for this setup to work.
The Raspberry Pi must be connected to the Internet via its built-in WiFi. Make sure to set this up before starting the rest of the configuration.
The Raspberry Pi will run a serial line IP (SLIP) interface on the USB port that is connected to the Launchpad and a NAT bridge to the WiFi network.
To set up the necessary steps, log in to a terminal on the Raspberry Pi and run the following command:
curl https://www.thingsquare.com/script/setup-slip.sh | sudo bash(See the actual commands of this script here.)
This will produce an output similar to this:
pi@raspberrypi:~ $ curl https://www.thingsquare.com/script/setup-slip.sh | sudo bash
  % Total    % Received % Xferd  Average Speed   Time    Time     Time  Current
                                 Dload  Upload   Total   Spent    Left  Speed
100  1470  100  1470    0     0  14747      0 --:--:-- --:--:-- --:--:-- 14848
This script will set up your Raspberry Pi as a serial gateway
420
exit 0

843
Installing dnsmasq
Reading package lists...
Building dependency tree...
Reading state information...
The following NEW packages will be installed:
  dnsmasq
0 upgraded, 1 newly installed, 0 to remove and 0 not upgraded.
Need to get 0 B/16.0 kB of archives.
After this operation, 73.7 kB of additional disk space will be used.
Selecting previously unselected package dnsmasq.
(Reading database ... 34431 files and directories currently installed.)
Preparing to unpack .../dnsmasq_2.76-5+rpi2_all.deb ...
Unpacking dnsmasq (2.76-5+rpi2) ...
Setting up dnsmasq (2.76-5+rpi2) ...
Processing triggers for systemd (232-25+deb9u1) ...
Configuring dnsmasq
Device must reboot to complete setup. To reboot, type "sudo reboot" (without quotes) and hit enter.
pi@raspberrypi:~ $
Reboot the device to complete the setup:
pi@raspberrypi:~ $ sudo rebootAfter some time, the serial gateway Launchpad should start to blink green.
Step 4: Configure the wireless network with the app
Install the Thingsquare app on your iOS or Android phone.
Turn on Bluetooth on your phone.
Open the app and tap Nearby. You should now see two devices in the list, the serial gateway and the non-gateway device.
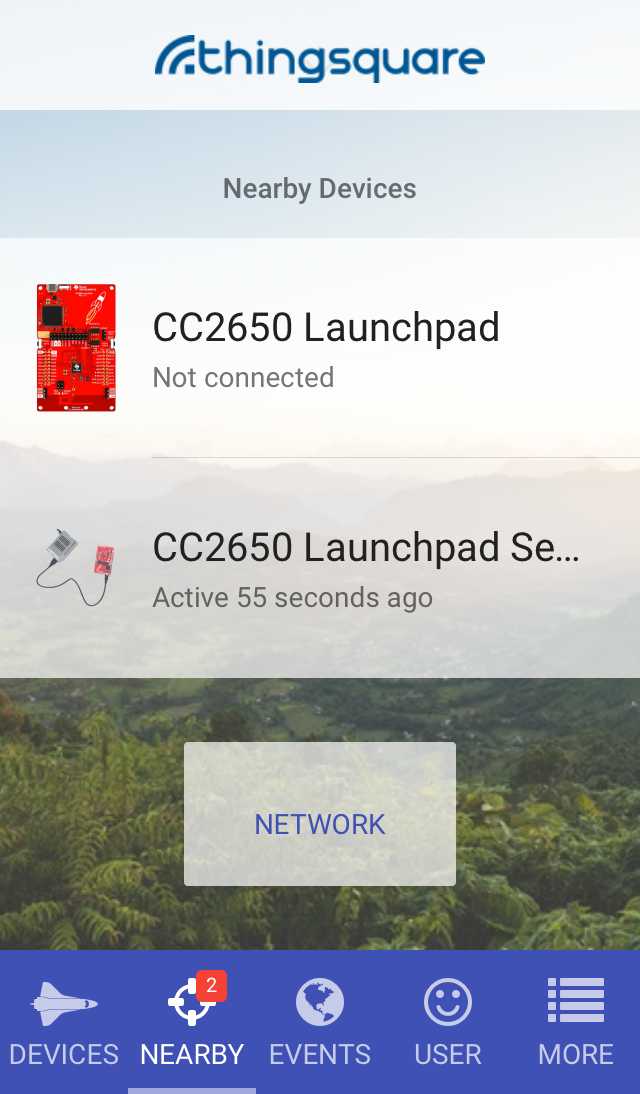
There should be two nearby devices in the list.
Tap the gateway and tap the Invite button.
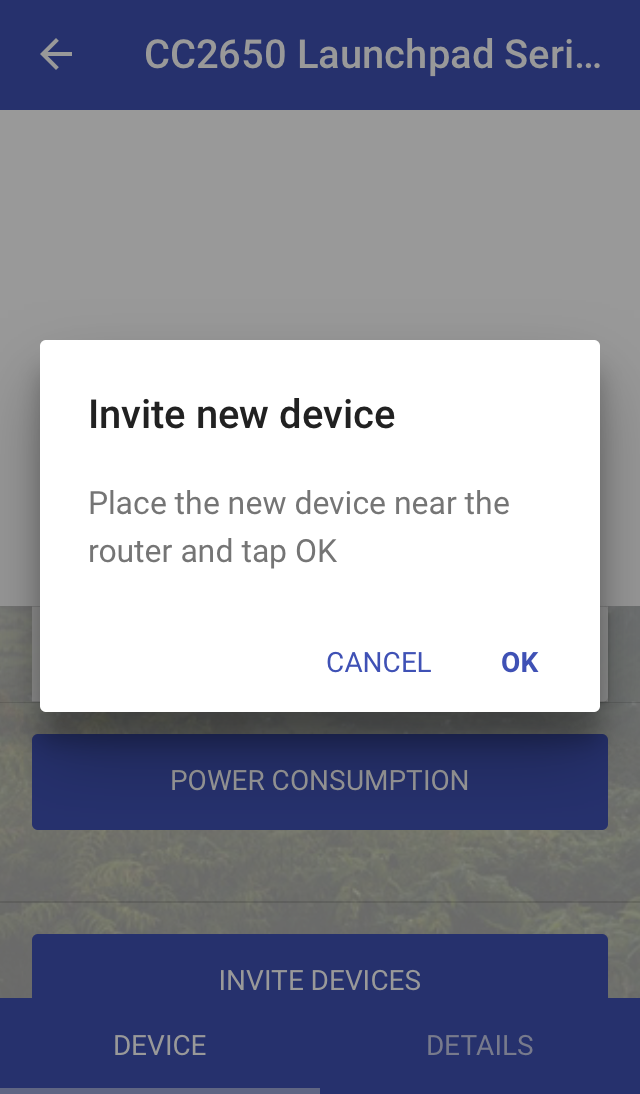
Invite the device via the gateway.
The non-gateway device should start blinking green. After some time the device should pop up in the list of nearby devices:


The status of the Launchpad will change as it gets connected.
Finally, tap the Remote button to enable remote access to the devices. You will need to register an account in the app and will also be able to access the device from the web interface.
Done!
Now we are done with the setup, and the wireless device is part of its wireless mesh network. To see the device responding to external commands, tap the Identify button to see the device blink its LED.